EXPEDITION REQUIREMENTS
- Previous High-Altitude Experience (mandatory): Climbers must have successfully ascended at least one 7,000m peak (recently) as per the latest regulations.
- Valid Climbing Permit: Issued by the Department of Tourism, Nepal.
- Registered Expedition Agency: The climb must be organized through a government-registered trekking/climbing agency like Himalayan Ecstasy Nepal (HEN).
- Experienced Guide Requirement: A licensed climbing guide (Sirdar/Guide) must be assigned to the expedition.
- Travel & Rescue Insurance: Comprehensive insurance covering high-altitude evacuation (helicopter rescue) is mandatory.
- Medical Fitness: A recent medical certificate confirming you are fit for extreme high-altitude climbing.
- Logistics & Documentation: Valid passport, visa, and all required expedition paperwork.
EXPEDITION HIGHLIGHTS
- Summit Mount Kangchenjunga (8,586 m), the third-highest mountain on Earth, along with the most remote and least crowded 8000-meter peaks.
- Difficulty or Grade Level: Challenging to very difficult expedition, suitable for experienced climbers with prior 7,000m peak experience and strong technical mountaineering skills.
- Experience a true expedition-style climb far from commercial routes like Everest.
- Explore the culturally rich Taplejung region with Limbu, Rai, Sherpa, and other local mountain communities.
- Trek through untouched forests, rivers, and high alpine valleys.
- Reach Kanchenjunga South Base Camp (Oktang) with direct views of the Yalung Glacier.
- Fully equipped base camp with dining, kitchen, communication, and support staff.
- Perform a traditional Puja ceremony before the climb.
- Acclimatization rotations through Camp I, Camp II, and Camp III.
- Technical climbing on glacier terrain, fixed ropes, and steep snow slopes.
- Final summit push through extreme altitude and exposed ridges.
- Panoramic summit views across Nepal and India border.
- Professional Sherpa support with a strong focus on safety and teamwork.
- Responsible expedition with base camp cleanup and Leave No Trace practice.
EXPEDITION CHALLENGES
- Technical Difficulty: The route from Camp I to Camp II involves glacier travel, crevasses, and fixed rope climbing. You will use crampons, ascenders, and sometimes ladders. It is not the most technical 8000er, but it is long and physically demanding. Above Camp II, the mountain becomes more exposed. The climb to Camp III and Camp IV is less technical but much harder due to altitude. Every step feels heavy. Even simple tasks take effort.
- Altitude and Endurance: You will spend many days above 6000 meters. During the summit push, you enter the death zone above 8000 meters. Oxygen is very low here, and your body starts to break down. Strong endurance is required. You must be able to keep moving even when your body feels completely drained.
- Weather Conditions: The weather in Kangchenjunga is unpredictable. Strong winds, snowfall, and sudden storms are common. The summit window is short, so timing is everything.
- Avalanche Risk: Due to heavy snow accumulation, avalanche risk is always present. Our Sherpa team carefully selects routes to reduce this risk, but it cannot be fully avoided.
- Objective Hazards: Crevasses on the glacier, falling ice (seracs), and unstable snow conditions are part of the climb. These are natural risks of high mountains.
- Remoteness: Unlike Everest, rescue and support are limited. This mountain is far from major infrastructure. That is why preparation and teamwork are very important.
The Ascent Plan
Base Camp to Camp I: Entering the Yalung Glacier
From base camp, you step onto the Yalung Glacier. This is where real climbing begins. You walk on ice, cross crevasses, and use fixed ropes in some sections. Crampons are required. Camp I is set on the glacier and acts as your first staging point.
Camp I to Camp II: Steeper Ice and Rope Work
This section is more demanding. The terrain becomes steeper, and you rely more on fixed ropes. You use ascenders to move upward safely. Breathing becomes harder, and the cold increases. Camp II is placed in a more exposed area with strong winds.
Camp II to Camp III: High Altitude Endurance
From Camp II, the climb is less technical but more exhausting. You are now above 6500 meters. Oxygen levels drop significantly. The route follows long snow slopes where each step takes effort. Camp III is where your body is tested the most.
Camp III to Camp IV: Entering the Death Zone
You move higher into extreme altitude. Camp IV is usually set around 7400 to 7600 meters. This is where you prepare for the summit push. Climbers use supplemental oxygen from here. Conditions are harsh, with strong winds and freezing temperatures.
Summit Push: Final Climb to 8,586 meters
The summit push begins at night. You climb slowly under headlamp light. The route includes steep snow slopes and exposed ridges. Fixed ropes guide your path. Your Sherpa leads and supports you at every step.
As you reach the top of Mount Kangchenjunga, you stand on the border of Nepal and India. The view is wide, wild, and untouched. After a short time on the summit, you begin your descent.
This is just as important as climbing up. You carefully return to Camp IV, then move down step by step back to base camp. This completes your Kangchenjunga expedition journey!
IMPORTANT: Essential High-Altitude Gear & Safety Notice
For a successful Kangchenjunga Expedition, having the right high-altitude equipment is not optional. These are critical for both safety and performance in extreme conditions.
- Supplemental Oxygen: It is strongly recommended to plan for an extra oxygen bottle in advance. This acts as a safety backup during summit push or emergencies.
- Mask and Regulator: Among the most important pieces of equipment. They must be in proper working condition. Any malfunction at high altitude can directly impact your ability to breathe and continue safely.
- Down Suit: A high-quality down suit is essential to withstand extreme cold conditions during higher camps and summit attempts.
- High-Altitude Mountaineering Boots: Reliable brands such as Scarpa or La Sportiva are recommended for proper insulation and support.
- Sleeping Bag (-50°C): A high-performance sleeping bag is necessary to ensure proper rest and protection against extreme temperatures.
- Gloves: Insulated, high-quality gloves are required to prevent frostbite and maintain dexterity.
- Helmet: A good-quality helmet is essential for protection in rocky and exposed sections.
Proper planning and ensuring the quality of these essential items play a vital role in the overall success and safety of the expedition.
Note from CEO: Every climber comes with different expectations, goals, and comfort levels. That is why we provide flexible options to match your experience, support needs, and expedition style.
Flexible Expedition Packages: Choose What Works for You
At Himalayan Ecstasy Nepal, we understand that every climber comes with a different level of experience, a different budget, and a different idea of how much support they need on the mountain. That is why we have structured the Kangchenjunga Expedition into three flexible options.
And here is something important to know upfront: you do not need a group to book. Individual climbers are welcome. If you are coming solo, we handle the official formalities by coordinating your documentation and permits with other registered expedition groups on the same mountain. You climb your own journey. We take care of the paperwork.
Option A: Full Board Expedition
The complete, fully managed experience from Kathmandu to the summit and back.
Everything is handled by our team including airport pickup, hotel stays, official briefings at the Ministry of Tourism, all trekking and expedition permits, licensed Sherpa guides and their insurance, porter support, liaison officer facilitation, full base camp infrastructure (dining tent, kitchen tent, sleeping tents, communication equipment), high-altitude cooks, route fixing, camp establishment, weather monitoring, and summit support.
You focus entirely on climbing. We handle everything else!
Option B: Company Service (Budget Expedition)
A more minimal arrangement for experienced climbers who prefer to manage certain aspects independently. HEN takes care of all the essential official requirements, including your expedition permit, Sherpa and his insurance, porter support, trekking permit, and liaison officer facilitation. Transportation from Kathmandu to Base Camp is also arranged.
Beyond that, climbers take on greater personal responsibility for their own logistics and gear. A cost-effective option without compromising on the non-negotiables.
Option C: Permit and Join Service
The most flexible and budget-friendly option. HEN arranges your climbing permit and all required official documentation, then coordinates your placement within an existing expedition group heading to Kangchenjunga in the same season. Base camp to summit support and base camp services are included.
This one's ideal for self-sufficient climbers who have their own team and gear but need the official framework and mountain logistics handled professionally!
Why Choose Kangchenjunga? The Mountain for True Explorers!
Not every climber is looking for Everest. Some want something quieter, wilder, and more real. That is exactly why Mount Kangchenjunga stands apart. This is not a crowded commercial route. This is a true expedition mountain!
It comes with remote valleys, long approach, fewer climbers, and a deeper connection with the Himalayas.
Kangchenjunga sits on the border of Nepal and India, but most expeditions are done from the Nepal side. Why? Because the route here is more practical, more scenic, and offers a complete Himalayan experience. From green lower valleys to high glacial terrain, this mountain gives you everything in one journey.
If you are the kind of climber who values raw adventure over luxury, and meaning over numbers, then Kangchenjunga is your mountain!
Who is Kangchenjunga Expedition For?
Kangchenjunga is not a beginner’s 8000-meter peak. Most climbers who attempt this mountain are already experienced in high-altitude mountaineering and are often working toward bigger long-term goals.
For many climbers, this expedition becomes part of a larger journey such as:
- Climbing their first 8000-meter peak
- Progressing toward Mount Everest
- Completing the Seven Summits (Seven Continents)
- Working toward the 14 Peaks above 8000 meters project
This mountain is ideal for climbers who:
- Have prior experience above 7000m
- Want a less crowded alternative to Everest
- Prefer a true expedition-style climb over commercial routes
- Are looking to build strong high-altitude experience for future big climbs
Every climber comes with different expectations. Some aim for the summit, while others focus on gaining experience in extreme altitude. Kangchenjunga offers both challenge and growth!
Why Choose Himalayan Ecstasy Nepal for Kangchenjunga Expedition?
An 8000-meter expedition is not just about reaching the summit. It is more about how safely and smoothly you get there!
At Himalayan Ecstasy Nepal, we focus on exactly that. Our team is built around experienced climbing Sherpas, strong logistics, and deep knowledge of remote Himalayan regions like this one of the Kanchanjunga Conservation Area.
Kangchenjunga is not an easy mountain to manage. Everything from transportation to base camp setup requires careful planning. We handle all of it!
From your arrival in Kathmandu to your summit push and safe return, every step is organized with precision. Our Sherpa team works closely with you, not just as guides but as your support system on the mountain.
You focus on climbing. We take care of everything else!
What Makes Kangchenjunga Expedition So Special?
Kangchenjunga is not just about altitude. It is about the full experience.
You start in the green hills of eastern Nepal, passing through villages where Limbu, Rai, Sherpa, and other local mountain communities live. These are not tourist-heavy places. This is real mountain life. People here depend on farming, livestock, and small trade like ginger, churpi, and herbs.
As you go higher, the landscape changes completely. Forests turn into alpine terrain. Valleys open up. And finally, you reach the massive Yalung Glacier beneath Kangchenjunga’s south face.
The climb itself is a mix of everything. Glacier travel. Fixed rope climbing. High altitude endurance. And a long, demanding summit push!
Once you're at the top, you stand on one of the highest points on Earth, looking across Nepal and India. That is what makes this expedition unforgettable!
Now that you understand what makes this mountain so unique, let’s break down how this expedition is structured. From flexible package options to the full journey experience, here are the main highlights you need to know before stepping into one of the wildest climbs in the Himalayas.
A Journey Through Remote Himalayan Landscapes
This expedition takes you far from the busy trekking routes of Nepal.
You move through the Taplejung region, where nature still feels untouched. Green hills, rivers, forests, and high alpine valleys shape your journey. Every day feels different as the landscape changes with altitude!
Cultural Encounters in Eastern Nepal: Meet Limbu and Rai Community
The Kangchenjunga region is rich in culture. You meet Limbu, Rai, Sherpa, and other local mountain communities along the way. Their lifestyle is simple, but deeply connected to nature.
The Rai and Limbu people are ancient communities of eastern Nepal, belonging to the Kirat group. They are believed to have come long ago from places like Yunnan (China) and the Assam valley, moving through the hills with their animals and slowly settling in the Kanchenjunga region.
They are considered among the earliest settlers of this area. Over time, they developed their own farming systems, traditions, and way of life connected closely to nature.
Before Nepal was unified, the Limbu people lived in a group of small kingdoms called Limbuwan, where they had their own leaders and rules. Later, in the 18th century, they became part of the Gorkha kingdom but were still allowed to keep their land rights.
Similarly, the Rai people, also known as Khambu, have a long history in the eastern hills, and their traditions are passed down through oral stories called Mundhum. Even today, both Rai and Limbu communities continue to follow their cultural practices, festivals, and traditional lifestyle.From traditional houses to local food and daily life, this part of the journey gives you something beyond climbing!
A True Expedition-Style Climb
Unlike Everest, Kangchenjunga is not crowded. You climb in small teams, around 40 to 50 climbers in total at base camp. This makes the experience more focused, more personal, and more real. Every step on the mountain feels earned!
From Glacier Travel to Summit Ridge
This climb is a complete mountaineering journey. You start with glacier travel at base camp, move through crevasses and fixed ropes, climb steep snow slopes, and finally push to the summit through exposed ridges! It surely tests your technical skills, endurance, and mindset.
Standing on the Third-Highest Mountain in the World
At 8,586 meters, Mount Kangchenjunga is not just a summit. It is an achievement that very few climbers reach!
And when you stand at the top of the third-highest mountain in the world, Mt. Kangchenjunga aka Mt. Kanchanjunga, looking across endless Himalayan peaks, you realize this is more than just a climb! It is a journey that stays with you for life.
Flora, Fauna & Wildlife
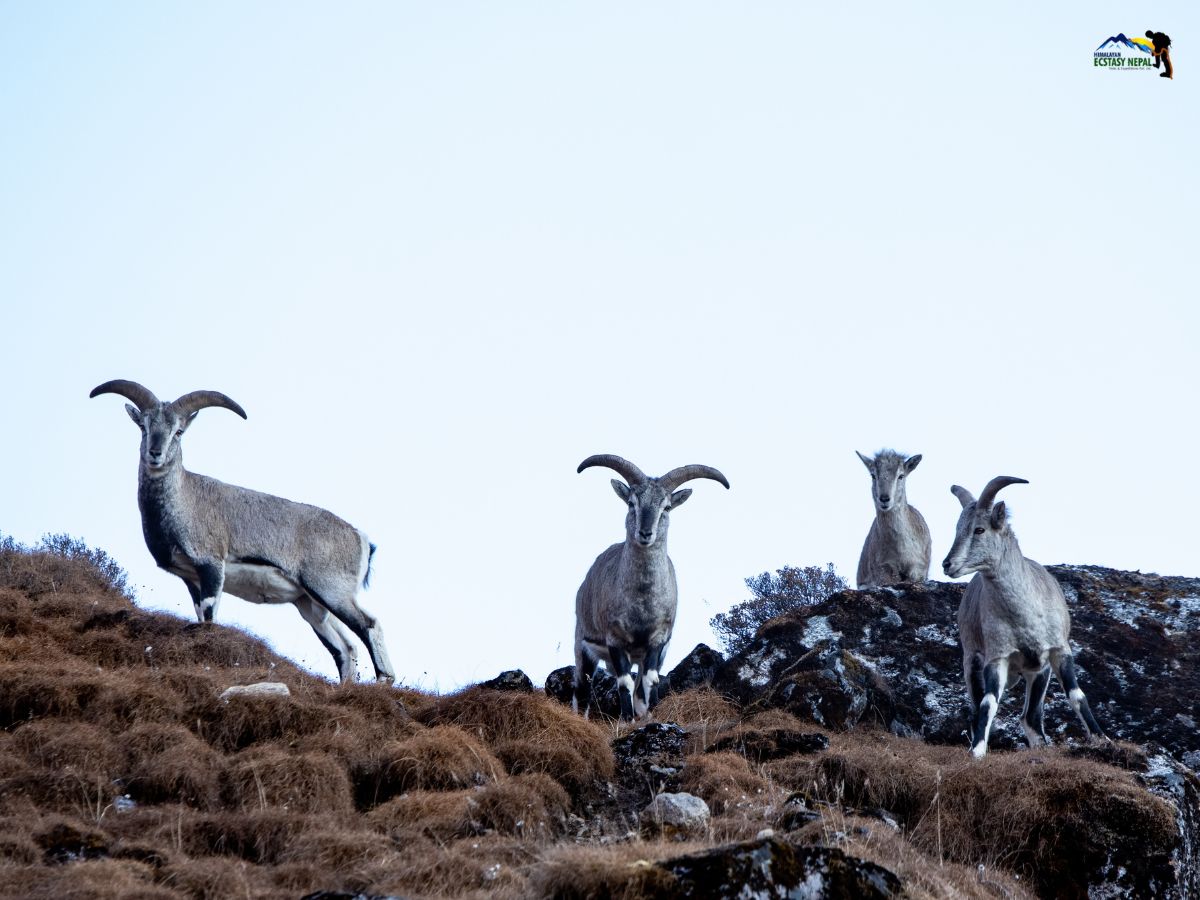
The Kangchenjunga region lies within the protected Kangchenjunga Conservation Area, making it one of the most ecologically rich and untouched regions in the Himalayas.
The lower trails pass through forests of rhododendron, pine, oak, and bamboo, while higher elevations transition into alpine terrain and glacial landscapes.
This remote environment is also home to rare Himalayan wildlife such as the Snow Leopard, Red Panda, Himalayan Tahr, Himalayan Blue Sheep, and the colorful Danphe.
While sightings are not guaranteed, the region’s untouched wilderness adds a unique natural dimension to the entire expedition experience.